How do I set up a room in Viz?
Whether you're starting from scratch or using a background image, the first step in setting up your Vizi is defining your space. Here's how to get started:
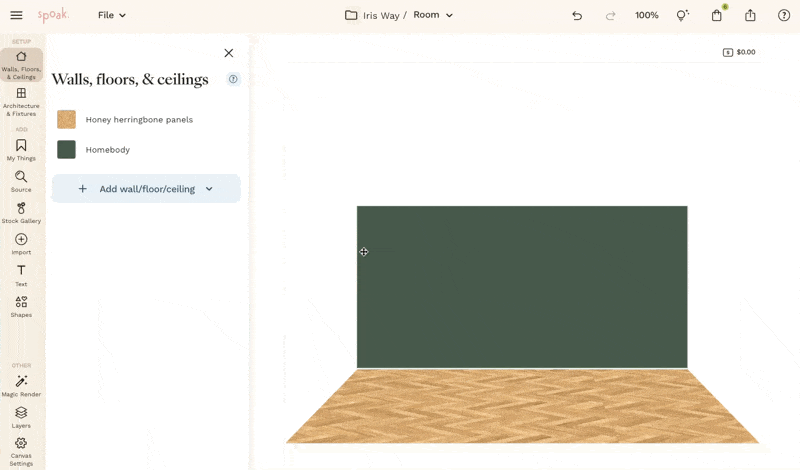
Option 1: Create a Room from Scratch
To build your space from the ground up:
-
Add walls, floors, and ceilings
These are the foundational elements that define the structure of your room. You can change the finishes of these walls to any paint color, wall paper, tile, or any other finish your design loving heart desires!
To add the side walls, simply drag the corners of the new wall to whatever angle you like to create a realistic perspective-
-
Use the Architecture & Fixtures tab
If you’d like, you can add architectural elements like doors and windows to further shape your space.
-
Start decorating!
You can now start bringing your vision to life by adding products from My Things or browsing items in the Source tab.


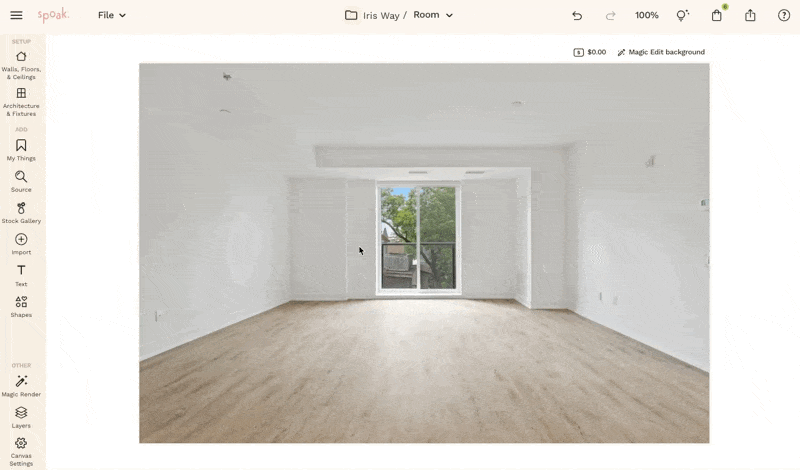
Option 2: Create a Vizi with a Background Image
If you’re starting with a real-life photo or inspiration image:
-
Add transparent walls, floors, and ceilings
This tells Vizi where the planes of the room are, so the auto perspective tool works correctly.
-
Use the Architecture & Fixtures tab
Add optional structural elements like windows or doors if you want to enhance the realism of your layout.
-
Start decorating!
Once your space is set, you can begin adding products from My Things or Source.
