
How does wall thickness work?
Every wall in Plan has a thickness, and rooms measure to the inside face of their walls. The size you draw is the size the room ends up.
Exterior and interior walls
Every wall is either an exterior wall or an interior wall, and each type has its own default thickness:
- Exterior walls start at 6 in, a common thickness for outside walls in the US.
- Interior walls start at 4½ in, a common thickness for walls between rooms.
Change these defaults for one plan in Plan settings, or for every new plan in Account preferences.
When you draw a room, the line you draw is the inside face of the room. The wall's thickness sits outside that line, so the room keeps the size you drew. Nothing shifts when you close the room.
Changing a single wall
- Click a wall to select it.
- Click Dimensions in the top toolbar.
- Under Wall, select Exterior, Interior, or Auto to set the wall type.
- Enter a new size in the Thickness fields.
- Under Thickness settings, choose which side moves when the thickness changes: Outside, Both sides, or Inside.
Choose Outside to keep the room's inside size the same while the wall grows outward.
Reading a wall's length from either side
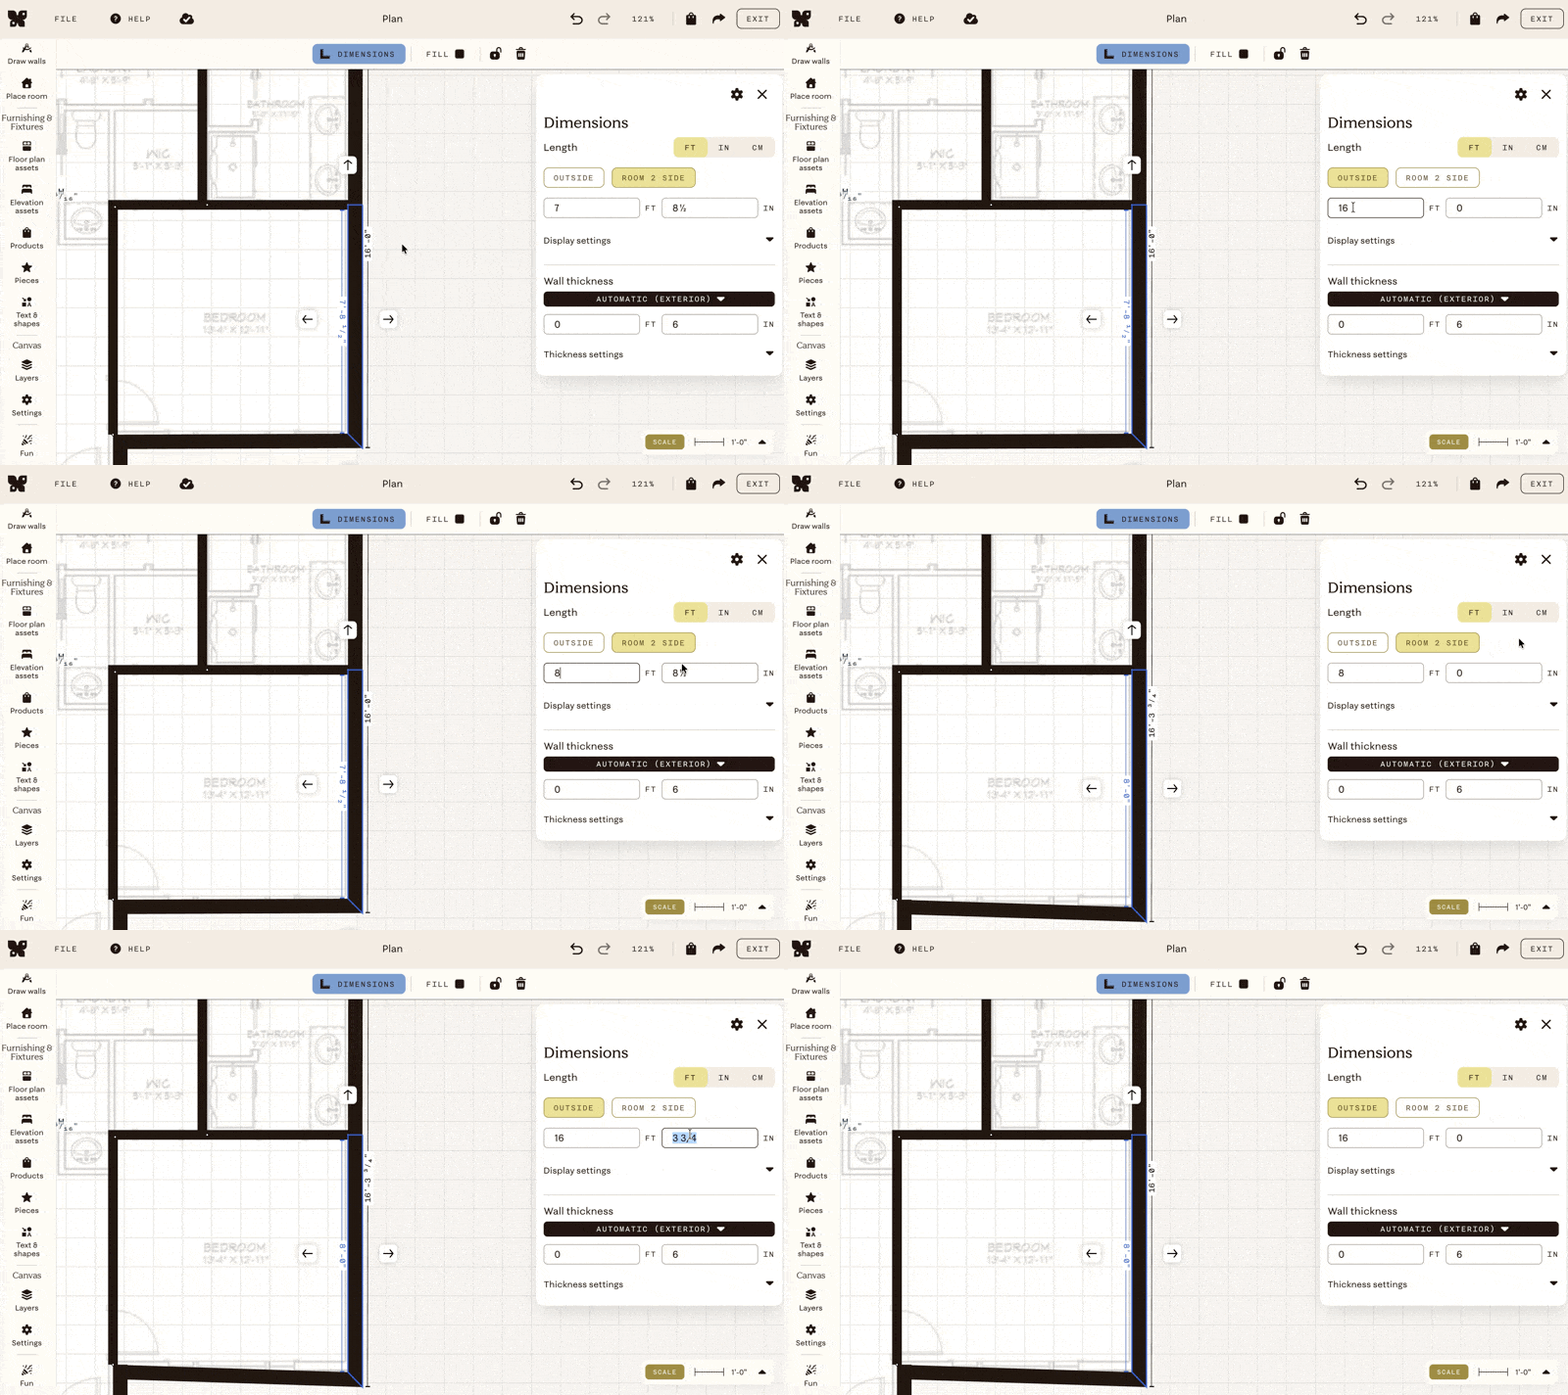
A thick wall has two lengths: the outside face and the face inside the room. In the Dimensions panel, choose Outside or the room's side (for example, Room 1 side) above the length fields. The length you see and edit matches the side you pick.
When an interior wall splits a longer wall between two rooms, the outside reads as one full length and each room reads its own. Hold Shift and click both pieces to select them together. They then act as one wall.
Drawing walls
The blue banner that appears while you draw walls lets you:
- Choose which side new walls grow from. Pick a side in the banner, or press T to switch.
- Preview the next wall. See the wall you're about to place and its lengths before you click.
- See your lengths as you go. Each wall you're drawing shows its length.
- Undo as you go. Press ⌘ + Z to take back the walls you've drawn one at a time, and ⌘ + Shift + Z to put them back. Undo and redo live in the top toolbar.
- Cancel one wall. Press Escape halfway through a wall to cancel only that wall.
Undo while drawing only reaches the walls from your current drawing session. To undo changes you made before you started, click Done to finish drawing first.

When you move a wall, the walls it stretches show their lengths as they change.
Uploading a blueprint
When you upload a blueprint, Plan detects the walls and keeps their thickness. If you haven't drawn any walls in the plan yet, the plan's default thicknesses update to match the blueprint. If you've already drawn walls, your existing defaults stay in place.